Author: Sloth_and_Lion

  • How to litter train a kitten

    How to litter train a kitten

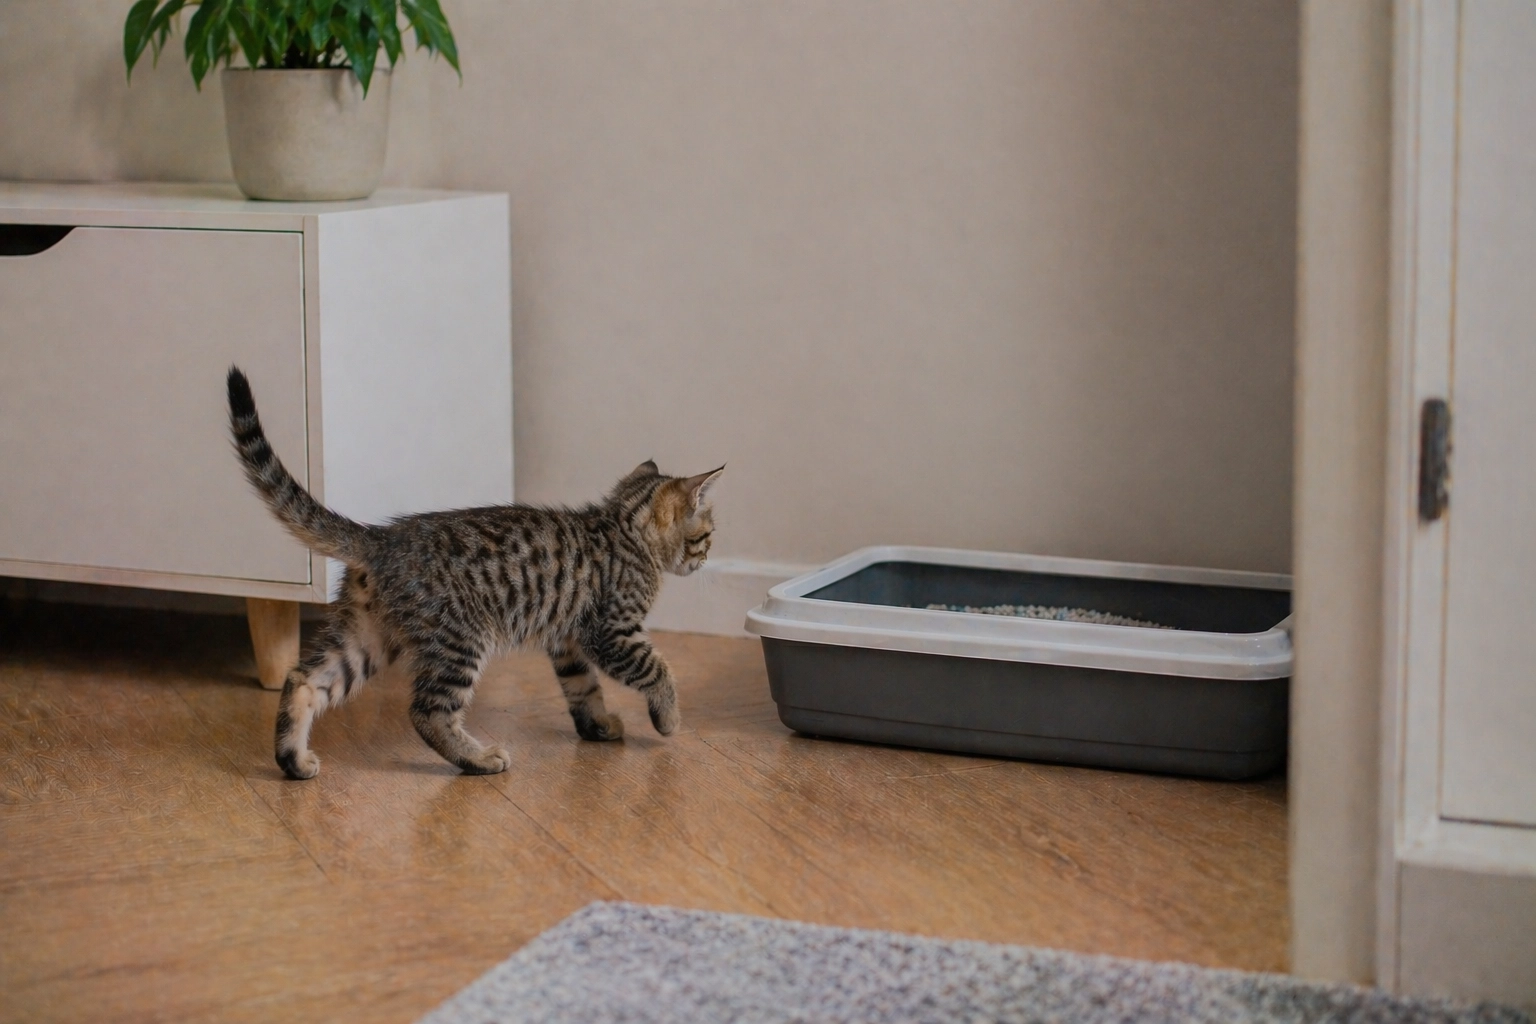
    Most kittens learn to use a litter box quickly when the setup is clear and the process isn’t rushed. Your main job is to choose the right box, pick a suitable litter and stay patient.

    Choose the right litter box

    Kittens do best with a litter box that has low sides so they can climb in easily. Place it in a quiet, low-traffic area away from noise and drafts where your kitten can feel safe and have privacy.

    If you live in a large home, it’s a good idea to set up at least two litter boxes in different areas, especially at first.

    Pick the right litter

    To help your kitten learn faster, choose an unscented litter. Good options include wood pellets, corn-based litter and clumping clay litter.

    Silica crystal litter controls odor well, but some kittens may try to chew or swallow it, which can be dangerous.

    Later on, you can test different types to see what your cat prefers.

    Gentle reminders work best

    Place your kitten in the litter box after naps, meals or active playtime. These are the moments when they’re most likely to need the litter box.

    Do not force, hold down or scare your kitten. Calmly showing the right spot several times is usually enough.

    Reinforce the habit

    If your kitten uses the litter box, praise them with affection, a gentle voice or a small treat.

    Accidents happen

    Mistakes during the first few days are a normal part of settling in.

    What to do:

    • clean the area thoroughly to remove odor
    • check whether the litter box location is convenient
    • move the box gradually if a better spot is needed
    • try a different type of litter
    • use a litter training attractant spray
    • remind your kitten more often after naps and meals

    Never rub your kitten’s nose in the mess, yell or punish them.

    Health issues

    If your kitten regularly avoids the litter box, cries when trying to go, has constipation, diarrhea or seems tired and unwell, the cause may be medical rather than behavioral. If you notice any of these signs, contact a trusted veterinarian as soon as possible.

    Can I litter train an adult cat?

    Yes, but it usually takes longer than with a kitten because adult cats may already have habits and past experiences.

    The method is the same: choose a comfortable litter box, place it in a quiet spot and find a litter your cat likes. Stay calm, be consistent and avoid punishment. If the cat used to go outdoors or in another place, full adjustment may take several weeks.

  • Night zoomies: why your cat runs around after dark

    Night zoomies: why your cat runs around after dark

    Just a second ago, your cat was peacefully lying on the couch. Then suddenly — a dramatic launch, a sharp turn, a leap through the hallway and a full-speed sprint across the house. That is the famous zoomies: a sudden burst of energy familiar to almost every cat owner.

    It may look strange, sound chaotic and sometimes feel annoying, but in most cases it is completely normal cat behavior.

    Why cats suddenly start running

    1. Built-up energy

    Cats sleep a lot, but that does not mean they do not need exercise. After a long rest, the body may need to release energy, and that can look like a wild race through the home.

    2. Hunting instincts

    Even if the only prey in the house is slippers and a blanket, your cat’s instincts are still there. Hiding, pouncing and chasing are part of being a little predator.

    3. Natural rhythms

    Many cats are especially active early in the morning and in the evening. That is why nighttime zoomies are a classic part of life with a cat.

    4. After using the litter box

    Some cats do a victory sprint after going to the bathroom. There are several theories about this. One suggests that the feeling of relief may stimulate nerves linked to a pleasant sensation.

    What owners can do

    There is usually no reason to worry if your cat:

    • runs with excitement, not fear
    • relaxes normally afterward
    • eats well
    • plays normally
    • moves freely without signs of pain

    Here are a few ways to help redirect that energy:

    1. Play with your cat

    10–15 minutes of active play during the day and in the evening often reduces nighttime activity.

    2. Add more enrichment

    Tunnels, scratching posts, climbing shelves and toy mice can help your cat burn energy at times other than 3 a.m.

    3. Do not punish the behavior

    Cats do not run out of spite. This is their natural (and not bad) behavior.

    4. Adjust the routine

    Sometimes it helps to schedule active play in the evening, followed by a meal. This matches a natural pattern: hunt, eat, rest.

    When to take a closer look

    If the running comes with fear, aggression, painful meowing, itching, limping or other concerning symptoms, it is a good idea to speak with a veterinarian.

    Nighttime zoomies are not a problem or a personality flaw. Your cat is simply following natural instincts and practicing life as a mighty hunter. Yes, sometimes loudly and while sending things flying – but that is such a cat thing to do!

  • Why your cat eats too fast and what to do

    Why your cat eats too fast and what to do

    If your cat eats too quickly, it is not just a funny or harmless habit. Eating too fast can cause discomfort and may leave your cat feeling hungry all the time. The good news is that in many cases, simple changes to feeding habits can help.

    Why it can be a problem

    Eating too fast may lead to:

    • regurgitation right after meals
    • nausea
    • hiccups
    • gas and stomach discomfort
    • overeating
    • weight gain

    If this happens often, it is worth looking for the cause.

    Why cats eat too fast

    There can be many reasons:

    • Competition around food. If there are several pets in the home, your cat may rush to eat before someone else gets their food.
    • Infrequent meals. If there are long gaps between meals, your cat may become overly eager at feeding time.
    • Stress or anxiety. Moving, noise, new pets or changes at home can affect how a cat behaves around food.
    • Past experiences. Cats adopted from shelters or rescued from the street often keep the habit of eating quickly whenever food is available.
    • It tastes too good. A favorite food, especially wet food, may disappear in seconds.

    What you can do

    The easiest solution is to make it harder for your cat to eat so quickly as before:

    • Use a slow feeder. A slow-feeder bowl or puzzle feeder encourages smaller bites and slower eating.
    • Split meals into smaller portions. Many cats do better with smaller meals more often. You can also place small portions of dry food in different spots around the home.
    • Feed pets separately. Removing competition can reduce the urge to rush.
    • Keep a routine. Regular mealtimes often help reduce anxiety.

    When to see a vet

    If your cat is constantly hungry, losing weight, regurgitates after every meal or suddenly changes behavior, it is best to speak with a veterinarian. Sometimes fast eating can be linked to an underlying health issue.

  • Top 5 essentials for every cat owner

    Top 5 essentials for every cat owner

    Taking good care of a cat involves more than just a litter box, food bowls and toys. There are a few everyday essentials that help support your cat’s health, comfort and overall well-being. Here are five useful items worth having at home.

    1. Brush or grooming comb

    Regular brushing helps remove loose fur, reduce mats and noticeably cut down on shedding around the home. Despite the common myth, grooming is important for all cats with fur, not only long-haired breeds.

    It can also become a great bonding moment that helps build trust between you and your cat.

    2. Nail clippers

    If your cat’s claws do not wear down naturally, they may need occasional trimming. For this, it is best to use nail clippers made specifically for pets, as they are safer and easier to handle than regular scissors.

    Important: Only trim the clear tip of the claw and avoid the sensitive inner part. If your cat gets nervous, it is perfectly fine to split the task into several short sessions.

    3. Parasite protection

    Even indoor cats need protection from fleas, ticks and internal parasites. There are different options available, including spot-on treatments, tablets and pastes. The right product should always be chosen according to your cat’s age and weight.

    4. Wipes, soft pads and cotton swabs

    Useful items for small daily care tasks: wiping the eyes, removing dirt from the coat or gently cleaning the chin and paws after coming home.

    5. Toothbrush and toothpaste for cats

    Dental care is often overlooked. Regular oral hygiene helps reduce the risk of plaque, dental disease and gum problems. Cats should only use toothbrushes and toothpaste designed specifically for pets.

    To complete your basic setup, keep a simple pet first-aid kit at home and save the contact details of a trusted veterinarian.

  • How to leash train your dog

    How to leash train your dog

    Leash training is the foundation of calm, comfortable walks. Some dogs accept a leash right away, while others need more time and support from their owner. A calm, step-by-step approach helps reduce stress and build the skill more quickly.

    When to start

    It is best to introduce the leash early, once your puppy has settled in at home and is ready to explore new objects and routines. Adult dogs can learn too — they may just need a little more time and patience.

    What to prepare first

    A few basics will make training easier:

    • a lightweight leash of the right length
    • a comfortable harness or collar that fits properly
    • treats for rewards

    If your dog feels uncomfortable or scared, training becomes much harder.

    How to get your dog used to a collar or harness

    Step 1. Let them investigate

    Show your dog the collar or harness and let them sniff it. Do not force it on right away. Reward curiosity with praise or treats.

    Step 2. Put it on indoors

    Put the collar or harness on for one or two minutes in a calm setting.

    During that time, try to:

    • start a game
    • offer treats
    • keep your dog busy with an easy activity

    Take it off before your dog becomes stressed.

    Step 3. Increase the time gradually

    Add a little more wearing time each day: a few minutes at first, then longer sessions.

    Step 4. Check the fit

    The collar or harness should not hang loosely or feel tight. You should be able to fit two fingers between the gear and your dog’s neck or body.

    If your dog scratches or tries to remove it

    This is normal at first. The sensation is new and unfamiliar. Gently redirect your dog’s attention with play, movement or treats.

    When to introduce the leash

    Once your dog can wear the collar or harness calmly indoors without paying attention to it, you can clip on the leash and move to the next stage.

    How to leash train your dog

    Step 1. Introduce the leash

    Just like with the collar, do not rush. Place the leash nearby and let your dog sniff it. Praise any interest with your voice and treats. Repeat over several days.

    Step 2. Clip it for a short time indoors

    When the leash no longer causes concern, clip it on briefly. Let your dog stand, move around or explore freely, but do not pull them along.

    Do not wait until your dog becomes nervous. It is better to build time gradually while distracting with play or treats.

    Step 3. Teach your dog to move with you

    Take a few steps around the house. When your dog walks beside you or comes to you willingly, praise and reward right away. This helps your dog learn that staying close to you pays off.

    Step 4. Respond to leash tension

    If your dog pulls forward, do not follow.

    Instead:

    • stop moving
    • wait for the leash to loosen
    • call your dog back to you
    • continue only when the leash is loose

    This teaches your dog that pulling does not move the walk forward.

    Step 5. Practice outside

    Start in quiet places: a yard, a calm street or an empty park. Then gradually move to more everyday environments.

    If you begin somewhere noisy or busy, it will be much harder for your dog to focus.

    Common problems and fixes

    Your dog freezes in place

    Do not pull. Crouch down, call them, offer a treat or take a step back

    Bites the leash

    Redirect to a toy or movement and reward calm behavior

    Pulls constantly

    Reduce distractions and change direction more often

    The dog is afraid of outside

    Keep walks short and let your dog get used to the environment gradually

    How long to train

    Five to ten minutes every day is better than one long session once a week. Consistency brings faster and more reliable results.

    What not to do

    • do not jerk the leash
    • do not shout
    • do not punish fear
    • do not overload your dog with training
    • do not expect perfect behavior in one day

    If you move gradually and avoid overwhelming your dog, the skill will develop much more easily. In time, the leash will stop being a source of stress and become part of relaxed, enjoyable walks.

  • Toxic foods for dogs: what to avoid

    Toxic foods for dogs: what to avoid

    Not all foods that are safe for humans are safe for dogs. Some can cause mild digestive upset, while others may lead to serious poisoning and require urgent veterinary care.

    Foods dogs should never have (even “just a little”)

    For a small dog, even a small amount can be a significant dose. Sensitivity also varies: something that caused no problems once may trigger a serious reaction another time.

    1. Chocolate and cocoa products 

    Contain theobromine and caffeine, which are highly toxic to dogs.

    2. Grapes and raisins

    Can cause acute kidney failure, even in small amounts.

    3. Onions and garlic (all forms)

    Contain organosulfur compounds that damage red blood cells and can lead to anemia.

    4. Xylitol

    A sweetener found in gum, candy, some baked goods and even certain toothpastes. It can cause a dangerous drop in blood sugar and lead to liver failure.

    5. Alcohol

    Dangerous even in very small amounts and can be present in unexpected foods. There is a risk of severe poisoning and even a fatal outcome.

    6. Coffee, energy drinks and tea 

    Due to caffeine, these can overstimulate the nervous system and cause a rapid heart rate, tremors and other serious symptoms.

    7. Cooked bones

    Especially poultry bones. They can splinter and cause serious injury to the digestive tract.

    8. Fatty, fried or very salty foods

    May lead to vomiting, diarrhea and even pancreatitis.

    9. Raw yeast dough

    Expands in the stomach and can cause dangerous bloating. As it ferments, it also produces alcohol, which adds another layer of risk (see p. 5).

    What to do if your dog eats something dangerous

    Do not wait for symptoms. Some types of poisoning take time to develop, even if your dog seems fine at first.

    What to do right away

    • remove any remaining food
    • note what was eaten, how much and when
    • keep the product packaging if possible
    • contact a veterinary clinic as soon as possible
    • follow professional advice

    Do not try to induce vomiting unless a veterinarian specifically tells you to do so. In some cases, it can make things worse.

    The general rule is simple: if you are not sure, do not feed it. Stick to dog-safe foods and treats made specifically for dogs.

  • Why your dog chews everything — and what to do about it

    Why your dog chews everything — and what to do about it

    Chewing is completely natural for dogs. It’s how they explore the world, relieve tension, keep themselves busy and even cope with teething. In many cases, the issue isn’t “bad behavior” — it’s a lack of safe, interesting things to chew.

    Why dogs chew things

    There isn’t just one reason. Here are the most common ones:

    1. Teething

    During teething, gums can feel sore and itchy. The urge to chew increases.

    What helps:

    • safe chew toys
    • teething toys designed for puppies

    Tip: rotate toys regularly to keep your dog interested.

    2. Boredom and lack of stimulation

    If a dog has nothing to do, they will find their own entertainment — furniture, shoes, remotes or boxes.

    Ask yourself honestly:

    • Is my dog getting enough walks?
    • Do we have regular playtime or training?

    If the answer is no, it’s time to add more variety to your dog’s day.

    3. Stress or anxiety

    Dogs often chew to cope with stress — for example, when left alone, during a move, with loud noises or changes in routine.

    What matters here:

    • identify the source of stress
    • create a stable, predictable routine
    • seek professional help if anxiety is significant

    How to fix the problem

    1. Remove temptation

    This is the fastest way to reduce damage.

    2. Offer a better option

    Your dog needs something they are allowed to chew.

    3. Reward the right choice

    If your dog picks their own toy, praise them, offer a treat or start a short play session.

    4. Increase physical activity

    After a proper walk, training session or active play, the urge to chew on random items usually drops.

    5. Do not punish after the fact

    If you find something damaged later, punishment will not help.

    When you may need extra help

    Consider professional support if your dog:

    • chews constantly and obsessively
    • injures their teeth or gums
    • eats non-food items
    • destroys things in panic when left alone

    In these cases, it’s best to consult a veterinarian or a qualified behavior specialist.

    Chewing is not your dog “getting back at you.” It’s a sign of a need that isn’t being met. Once you understand the reason and offer a better outlet, the behavior usually becomes much less of a problem.

  • How to choose a leash and harness for your dog

    How to choose a leash and harness for your dog

    A comfortable walk starts with the right leash and harness. The gear you choose affects your dog’s comfort, your control and overall safety. Poorly fitted or low-quality equipment can restrict movement, cause discomfort or fail at the worst possible moment.

    Types of leashes

    The right leash depends on your dog’s size and how you usually walk them.

    1. Standard leash

    A simple, reliable option for everyday use. Works well for most dogs. In the city, a length of about 1.2 to 2 meters is usually ideal.

    Best for: daily walks, training, vet visits.

    2. Retractable leash

    Gives your dog more freedom to roam, but offers less control and can create sudden pulling. It’s also less durable due to the internal mechanism.

    Best for: calm dogs in safe, open areas.

    3. Long line

    Typically 3 to 10 meters long. Great for training and outdoor walks where your dog can have more space without being fully off-leash.

    Best for: training, recall practice, and outdoor walks where your dog can have more freedom without being fully off-leash.

    Leash materials

    • Nylon — lightweight, affordable, easy to clean
    • Leather — durable, long-lasting, softens over time
    • Canvas / webbing — strong and reliable, good for larger dogs
    • Rubberized — better grip, especially in wet conditions

    What to check before buying

    • the clip opens easily but stays securely fastened
    • stitching is strong and even
    • the handle feels comfortable in your hand
    • the leash weight matches your dog’s size

    Collar or harness?

    There is no one-size-fits-all answer.

    A collar and leash is a classic setup that works well for calm dogs who don’t pull and respond reliably to commands.

    If your dog tends to lunge forward, coughs when the leash tightens or has a sensitive neck, a harness is usually the more comfortable option. It distributes pressure across the body instead of the neck.

    How to choose a harness

    A harness should fit snugly without putting pressure on the body. A good design allows free movement and does not rub the skin.

    Types of harnesses

    1. Y-shaped harness

    Straps run across the chest and between the front legs, leaving the shoulders free. This design does not put pressure on the neck and allows natural movement, making it a great choice for active daily walks.

    Key points:

    • proper adjustment is important to avoid rubbing under the legs
    • if too loose, the dog may slip out

    2. Vest-style harness

    A softer, wider design, often used for small dogs. The fabric sits gently against the body and reduces pressure from straps.

    Key points:

    • may feel warmer in hot weather
    • make sure it doesn’t rub or stay damp

    3. No-pull harness

    Features a front clip on the chest to help reduce pulling. It gently redirects the dog when they pull forward, making walks easier with strong or untrained dogs.

    Key points:

    • does not replace proper leash training
    • may shift to the side if not fitted correctly
    • choose a model that does not restrict front leg movement

    How to choose the right size

    It’s best to take measurements and compare them to the brand’s size chart.

    What to measure

    You’ll usually need:

    • chest girth — the widest part of the body, just behind the front legs
    • neck girth — at the base of the neck where the harness sits

    Sometimes it also helps to know your dog’s back length and weight.

    What to do next

    Each brand has its own sizing. You can usually find it on the packaging, product page or label.

    Sizes are often listed as XS, S, M, L, XL or in centimeters.

    Important: a size M in one brand may not match a size M in another, so do not rely on the letter alone.

    If your dog falls between two sizes, it is usually better to choose the larger one — especially if the harness is adjustable.

    For example, if your dog’s chest measures 52 cm and the chart shows:

    • S — 40–50 cm
    • M — 50–60 cm

    Choose M if there is room for adjustment.

    Check the fit after buying

    Once the harness is on, make sure it:

    • does not hang loosely
    • does not dig into the body
    • does not rub under the legs
    • does not restrict movement

    A simple rule: you should be able to fit two fingers between the strap and your dog’s body.

    Common mistakes

    • buying without taking measurements
    • using a leash that is too thin for a large dog or too heavy for a small one
    • choosing a harness that rubs under the legs
    • picking a harness that is too loose and easy to escape from

    The right gear is one that feels comfortable for your dog — and gives you confidence and control during every walk.

  • Dog clothing: how to choose

    Dog clothing: how to choose

    Dog clothing is not necessary for every pet or every situation. For some dogs, it helps make walks more comfortable, while for others it may be unnecessary. The key is to match the clothing to the weather and your dog’s comfort.

    When clothing is actually needed

    Clothing is most useful for:

    • small dogs
    • short-haired breeds
    • dogs without an undercoat
    • senior dogs
    • puppies
    • dogs after a short haircut 
    • rainy, snowy, windy or cold weather

    For example, breeds like Chihuahuas, Italian Greyhounds, Chinese Cresteds, Toy Terriers and Miniature Pinschers often benefit from clothing.

    When you can skip it

    Many dogs with thick coats and dense undercoats (such as Huskies, Malamutes, Samoyeds and Newfoundlands) are comfortable without extra layers in mild weather. That said, even these breeds may benefit from a raincoat or protection from mud.

    How to choose dog clothing

    1. By season

    • rainy fall — a lightweight raincoat or waterproof layer
    • winter — insulated options with wind and water protection
    • spring — lighter protection from damp weather and wind

    2. By fit

    Good clothing should:

    • not rub or irritate
    • not restrict movement
    • stay in place without twisting
    • not put pressure on the neck, chest or underarms
    • allow your dog to go to the bathroom comfortably

    If your dog moves stiffly, freezes or keeps trying to remove the clothing, it’s a sign the fit isn’t right.

    3. By material

    Pay attention to:

    • outer fabric suitable for the weather
    • soft inner lining
    • strong stitching
    • easy-to-use fasteners
    • machine-washable materials

    How to take measurements

    You will usually need three measurements:

    • back length (from the base of the neck to the base of the tail)
    • chest girth (the widest part of the body)
    • neck girth

    Always compare your measurements with the brand’s size chart, as sizing can vary between manufacturers.

    How to get your dog used to clothing

    If your dog has never worn clothes before, take it step by step:

    • let them sniff the item first
    • try it on briefly at home
    • praise and reward
    • gradually increase wearing time

    Common mistakes

    • guessing the size instead of measuring
    • choosing heavy or stiff fabrics
    • overheating the dog
    • leaving clothing wet after walks

    Clothing only helps when it actually makes your dog more comfortable and protects them from the weather. If it fits well, doesn’t restrict movement and matches the season, it’s doing its job.

  • Essential grooming supplies for your dog

    Essential grooming supplies for your dog

    Dog care is not just about feeding and walks. To keep your dog comfortable day to day, it helps to have a basic set of grooming and hygiene essentials at home.

    You don’t need to buy everything at once or go for a full setup right away. It’s better to start with a practical core kit and add more as needed.

    Basic dog grooming checklist

    1. Coat care

    Important: different coat types require different tools.

    For short-haired breeds(such as Labrador Retrievers, Beagles, Pugs, Dobermans):

    • grooming glove
    • fine-tooth comb
    • brush for short coats
    • deshedding tool (for some coat types)

    For medium-haired breeds(such as Huskies or Corgis):

    • grooming glove
    • comb with mixed tooth lengths
    • deshedding tool
    • slicker brush
    • dematting tool (if needed)

    For long-haired breeds(such as Shih Tzus, Collies, Maltese and others), a more complete set is needed:

    • grooming glove
    • wide-tooth comb
    • fine-tooth comb
    • deshedding tool
    • slicker brush
    • dematting tool
    • scissors

    Dogs with wire-haired breeds do not have an undercoat, so deshedding tools and slicker brushes are not used. A suitable brush and a stripping comb are usually enough.

    2. Bathing and hygiene

    • dog shampoo
    • a separate towel
    • wipes or soft cloths for cleaning paws
    • conditioner (if needed)

    Human shampoos are not suitable for dogs.

    3. Paws and nails

    • nail clippers in the right size
    • nail file (optional)
    • paw balm or protective treatment

    Common mistakes

    • buying random products without considering the dog’s size
    • using human products instead of dog-specific ones
    • choosing cheap tools that are uncomfortable to use
    • buying too many items instead of starting with a basic set
    • not replacing consumables on time

    Good care is not about having a lot of tools, but about choosing the right ones. A simple, practical set that fits your dog and is used regularly is more than enough.