Cats need constant access to water. Proper hydration supports kidney function, urinary health, digestion and overall well-being. If your cat drinks too little or suddenly starts drinking much more than usual, it is important to pay attention.
How much water is normal?
On average, an adult cat needs around 40–60 ml of fluid per kilogram of body weight per day:
3 kg cat: 120–180 ml per day
4 kg cat: 160–240 ml per day
5 kg cat: 200–300 ml per day
Why real-life numbers may vary
The figures above refer to the total daily fluid intake, not just the water your cat drinks from a bowl.
Several factors can affect this:
Diet. Cats that eat wet food get part of their fluid from meals. Cats on dry food usually drink more from their bowl.
Weather and activity. In hot weather, warm indoor temperatures or after active play, cats may drink more than usual.
Age. Kittens, senior cats, pregnant cats and nursing cats may have different hydration needs than healthy adult cats.
How to tell if your cat is drinking too little
Pay attention if your cat:
rarely goes to the water bowl
urinates less than usual
seems lethargic
eats less
prefers drinking from the tap but ignores the bowl
has dry gums
How to help your cat drink more
Place several water bowls around the home. Many cats drink more when water is available in different rooms.
Change the water daily. Fresh water is usually more appealing.
Choose the right bowl. Many cats prefer wide bowls where their whiskers do not touch the sides.
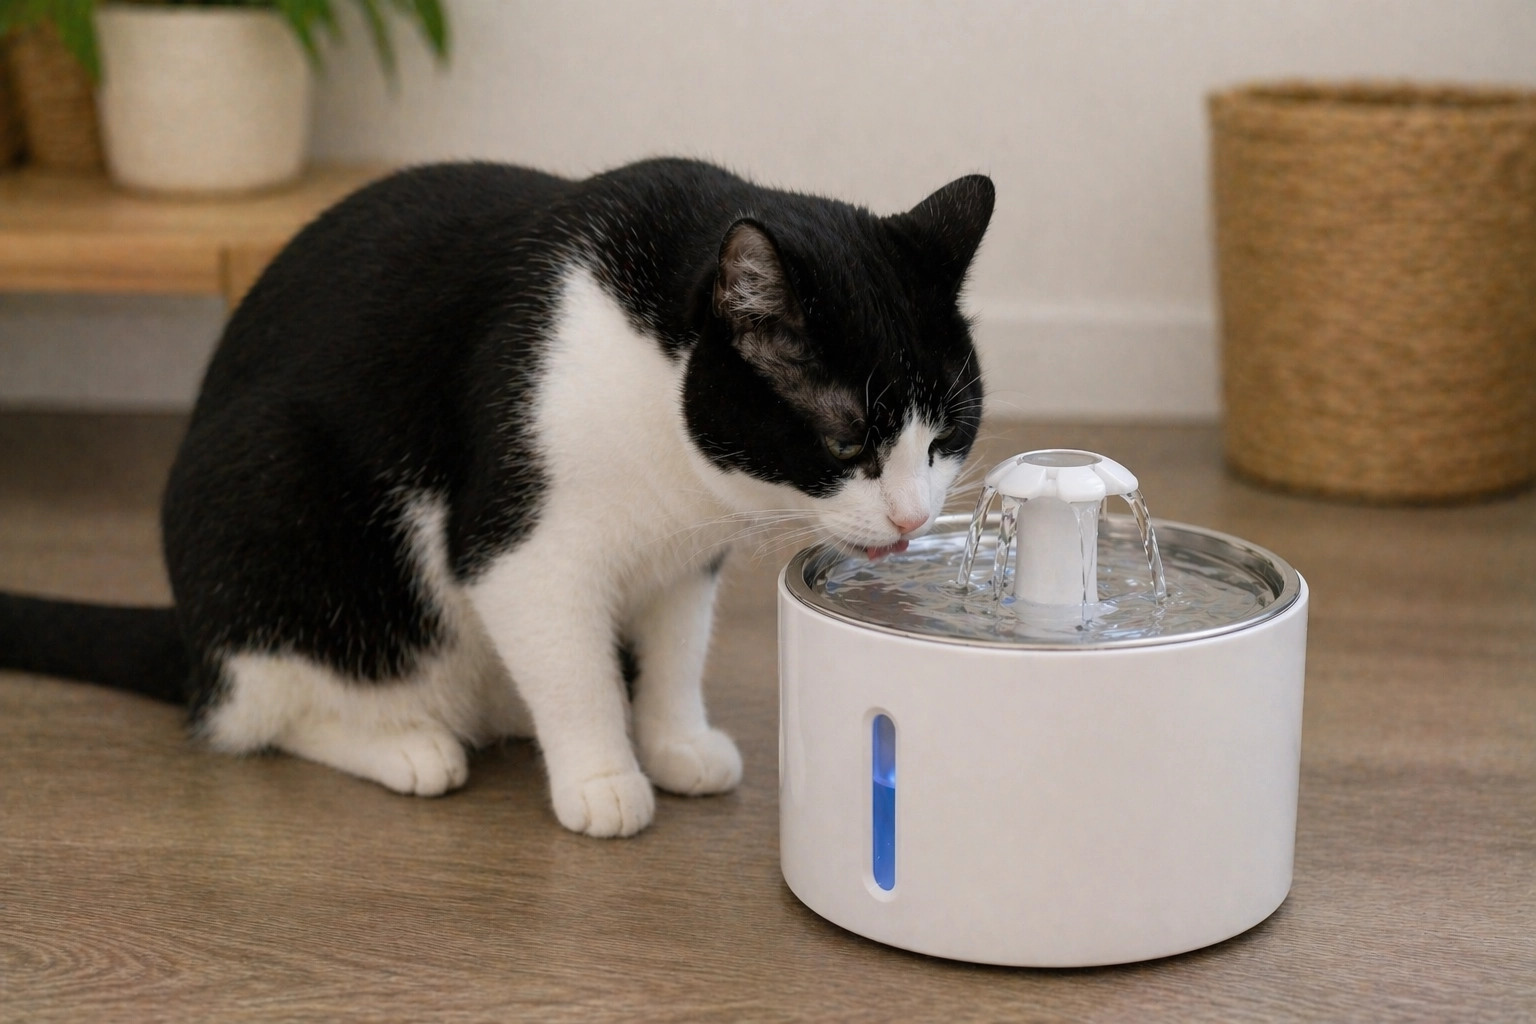
Try a cat fountain. Moving water often attracts cats more than still water.
Add wet food. An easy way to increase total fluid intake.
What kind of water should you give a cat?
Cats should only be offered clean, fresh water with no odor or unusual taste. It should be replaced daily. Good-quality filtered or bottled water is often the best option.
When to see a veterinarian
If your cat drinks far too little or too much, urinates frequently, loses weight or seems lethargic, do not delay seeking veterinary advice.
Pay attention not only to the water bowl, but to your cat’s overall behavior as well. A steady interest in drinking is an important sign of good health.
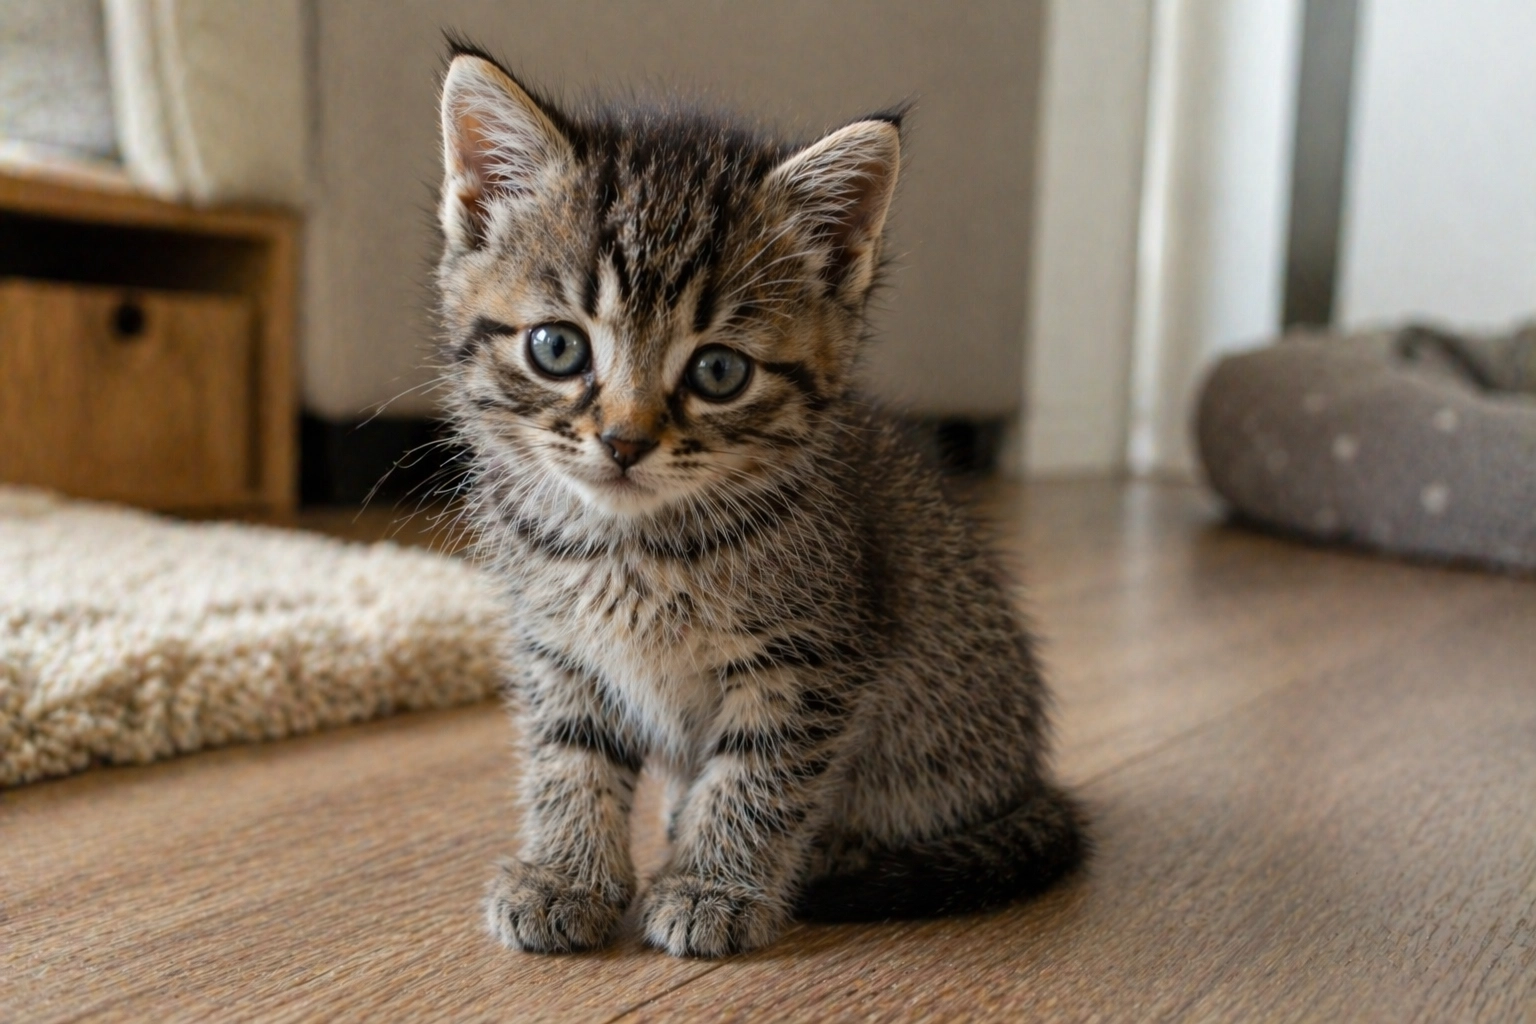
Found a kitten outside and decided to bring it home? The first few hours can feel overwhelming. How do you get the kitten home safely, what should you feed it, where should it stay and what comes next? Here is a simple guide to help you through the first days together.
Make sure the kitten really needs help
A kitten alone does not always mean an abandoned kitten. The mother cat may be nearby. One important note: very young kittens that are still blind need a nursing mother or bottle-feeding with kitten formula on a strict schedule. That is a separate topic. This guide is for kittens that can already eat on their own — usually from around three weeks old, ideally four weeks or older.
If the kitten is near a road, looks weak, dirty, underweight or seems to have been alone for a long time, it is best to step in quickly.
Bring the kitten home safely
Use a pet carrier, a box with air holes or a container lined with a soft towel or blanket. The kitten should not be able to jump out and should feel secure during the trip.
Do not carry the kitten in your hands in the car or outside. If possible, use a towel, blanket, gloves or a carrier first, and avoid unnecessary hand contact until the first veterinary check-up.
First steps at home
1. A quiet space of their own
Set up a small calm area: a separate room, a quiet corner or a large crate/playpen. During the first few days, many kittens adjust more easily in a smaller safe space than in the whole home right away.
2. Warmth and rest
Even an older kitten may arrive scared and cold after life outside. Give them a chance to hide, warm up and catch their breath.
3. Water and food
Provide fresh water and offer age-appropriate kitten food. Start with small portions. There is no need to give too much food at once out of pity.
Add a litter box
Place an easy-to-access litter box near the resting area, but not right next to the food and water bowls.
You may also like our guide A kitten at home: what to buy and how to prepare, where we cover the essentials for a smooth start.
What to do in the next few days
1. Book a vet visit
A veterinary check-up should be one of your first priorities. The kitten should be assessed for overall condition, eyes, skin, abdomen, parasites, approximate age and general health.
2. Start parasite treatment
Any treatment should be chosen based on the kitten’s age and weight.
3. Plan vaccinations
Your veterinarian will tell you when it is the right time to begin vaccinations.
Keep pets separated at first
If you already have a cat or dog, do not introduce them immediately. Keep the new kitten in a separate room for the first two weeks.
Help the kitten settle in
keep noise to a minimum
do not force contact
allow time to explore and feel safe
play gently and in short sessions
keep a calm daily routine
speak in a soft voice
Some kittens climb into your arms right away. Others need a few days.
Essentials to buy first
food and water bowls
kitten food
litter box and litter
a bed or blanket
a toy
a carrier
If you decided to take a found kitten home, the most important things in the first days are safety, calm surroundings, basic care and a veterinary check-up. Do not worry if everything is not perfect right away. For a kitten like this, even simple care, safety and a peaceful home can already change life for the better.
Walks are not right for every cat, but for some pets they can be a great way to explore, stay active and enjoy new experiences. The key is not to take your cat outside on impulse.
Do all cats need walks?
No. Many indoor cats live perfectly happy lives with playtime, scratching posts, climbing shelves and attention from their owners. Walks are not an essential part of cat care — they are simply an extra option.
They are usually best suited to curious and confident cats.
Walks are not recommended for:
kittens under six months old
unvaccinated cats
cats recovering from illness or surgery
highly anxious cats
senior cats that clearly feel uncomfortable outdoors
Why free roaming is risky
We strongly advise against letting an indoor cat roam outside alone without supervision. Free roaming comes with a high risk of injury, poisoning, fights with other animals, infections, traffic accidents and getting lost. Even a quiet yard cannot guarantee safety.
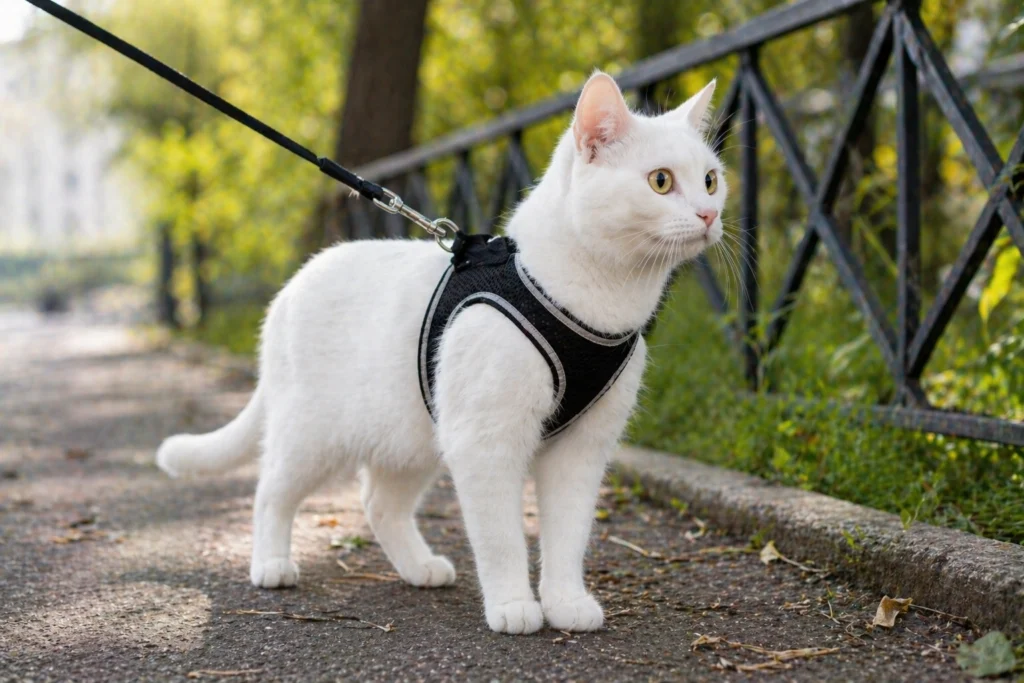
If your cat is interested in going outside, the safer option is a supervised walk with a harness.
What to do before the first walk
1. Vaccinations and parasite prevention
Before going outside, your cat should be up to date on core vaccinations. Regular protection against fleas, ticks and other parasites is also important.
Even a short walk means contact with the outside environment, so prevention matters.
2. Choose the right harness
For walks, use a harness rather than a collar. A harness distributes pressure more safely and reduces the risk of injury.
It should fit snugly without being too tight.
3. Practice at home first
Let your cat get used to the harness indoors first. Allow time to sniff it, inspect it and wear it for a few minutes at a time.
Once your cat is comfortable, gradually introduce the leash.
Pick quiet places
Choose calm areas without dogs, cars or crowds. A quiet courtyard, enclosed space or peaceful park with trees can work well.
When not to go outside
Skip walks in these situations:
bad weather: cold, heat, rain or strong wind
noisy times or crowded places
if your cat feels nervous or unwell
Cold weather can be especially risky for short-haired cats, kittens and cats without a thick undercoat.
What a walk looks like
You will not walk a cat the same way you walk a dog. Cats prefer to set their own pace. They stop, sniff, observe and decide where to go next.
Your role is to follow along and keep them safe.
Depending on your cat’s mood, a walk may last five minutes or thirty. Both are completely normal.
Important things to remember
do not pull the leash to force your cat in another direction
do not approach unfamiliar animals
do not remove the harness outdoors
watch your cat’s mood and physical condition carefully
When it may be better to wait
It is best to pause outdoor walks if your cat becomes very frightened, hides, stays stressed or needs a long time to recover afterward. In that case, home life is clearly the better option.
You can walk a cat, but only if your cat genuinely enjoys it. The best walk is one that leaves your pet calm, comfortable and content afterward.
A bowl may seem like a simple purchase, but it can affect your cat’s daily comfort and sometimes even their willingness to eat or drink. In this guide, we look at what kind of bowls your whiskered companion really needs.
How many bowls does a cat need?
At minimum, two:
one for water
one for food
If your cat eats both wet and dry food, it is best to have separate bowls for each type.
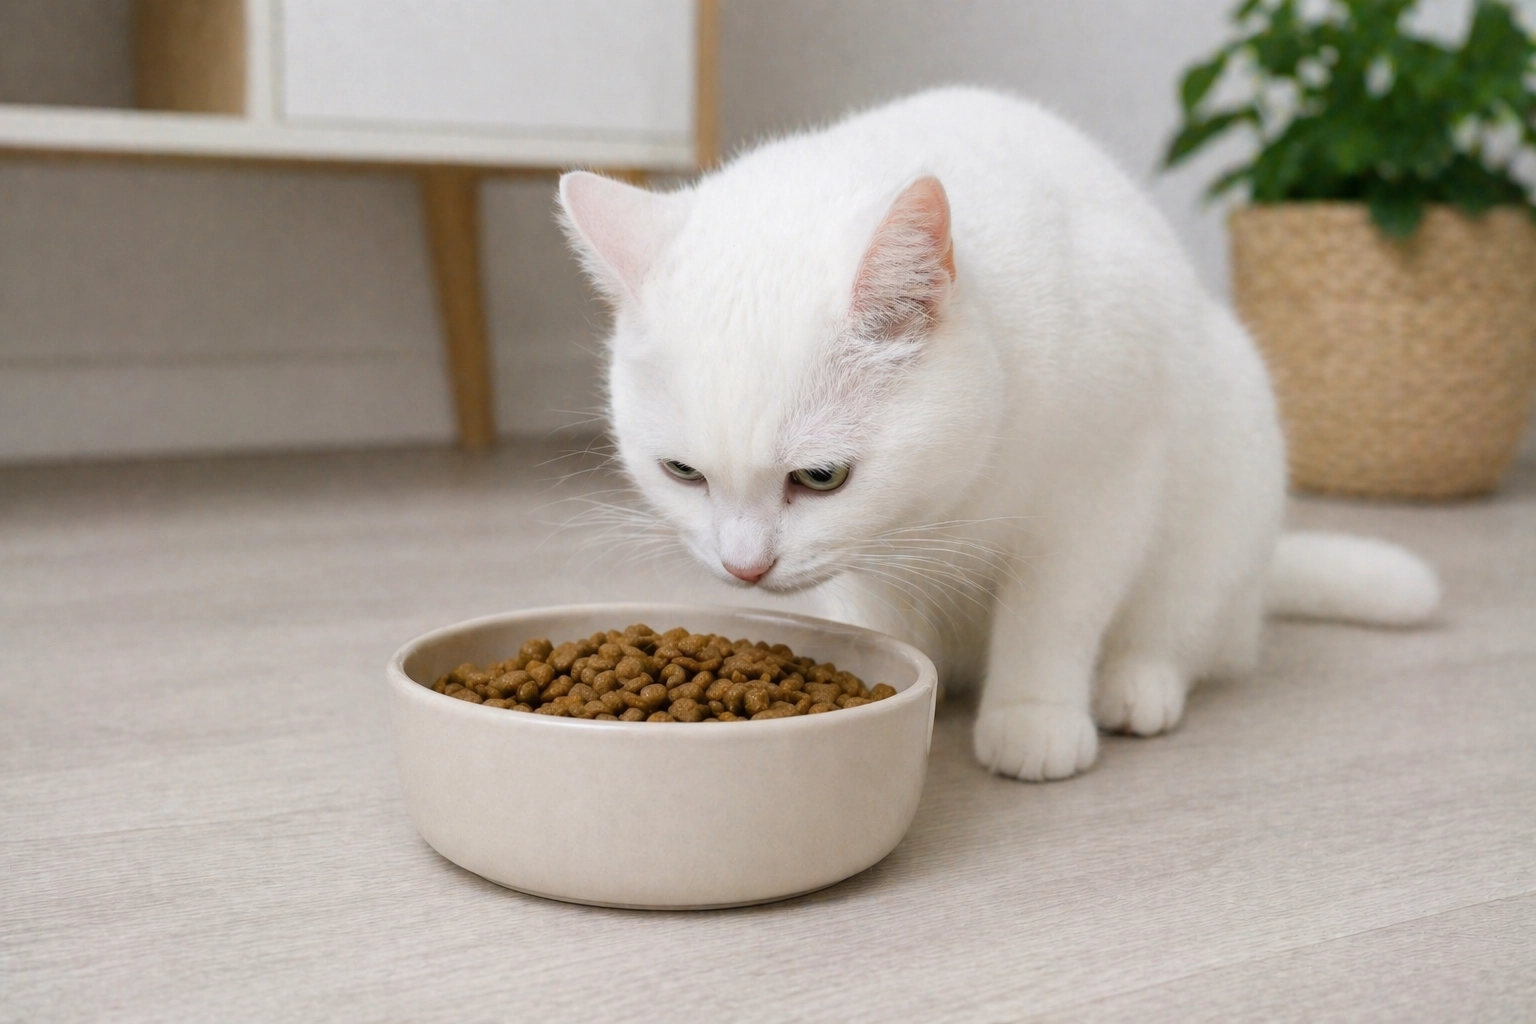
What kind of bowl is best for a cat?
Ceramic. Heavy, stable, easy to clean and resistant to odors. One of the best choices for everyday use at home.
Stainless steel. Durable, hygienic and long-lasting. A great option for daily use.
Plastic. The lightest and most affordable option, but plastic bowls can scratch easily, absorb odors and wear out faster. Poor-quality plastic may even release unwanted substances into food or water.
How to choose the right size
The bowl should suit your cat’s size and feel comfortable to use every day. One that is too small will empty quickly, while one that is too large may take up unnecessary space.
For most cats, medium-sized bowls work well and hold a single portion without overflowing. For water, a larger bowl is often more practical so fresh water stays available throughout the day.
The most important rule is simple: your cat should be able to eat and drink comfortably without pressing their face against the sides or brushing their whiskers against the rim.
How to care for your cat’s bowls
wash bowls daily
change the water every day
do not leave wet food sitting out for hours
check regularly for chips or damage and replace bowls when needed
Where to place the bowls
Choose a calm spot away from noise and busy walkways. It is often a good idea to place the water bowl separately from the food, as many cats prefer to drink this way. Food and water should also not be placed next to the litter box.
Getting a puppy is exciting, but it also changes your daily routine completely. The first few weeks are usually about feeding schedules, sleep, potty training and overall adjustment. The better you prepare in advance, the less stressful it will be for both the puppy and your household.
Your main goal at the start is to create a safe environment, get the essentials ready and understand what to expect in the first days.
What to do before your puppy arrives
1. Set up a safe area
Your puppy needs a space where they can rest and feel secure, while still being easy to supervise. A kitchen, part of a room, a playpen or a gated area all work well.
Why it helps:
reduces the risk of chewing unwanted items
makes potty training easier
helps establish a routine
prevents overwhelm from too much space
2. Remove potential hazards
Puppies explore the world with their mouths. Remove anything dangerous from their reach:
cables, chargers, extension cords
household chemicals
medications
trash bins
small objects
shoes
children’s toys
toxic plants (such as dieffenbachia, lily, aloe vera, ivy and cyclamen)
plastic bags, threads, rubber bands
3. Plan for potty training
Decide in advance where the puppy will go to the bathroom. This could be pee pads at home or a schedule of frequent outdoor trips if the puppy is old enough.
Make sure you have:
pee pads
odor remover
wipes and paper towels
Basic checklist: what to buy in advance
1. Food and water
at least two stable bowls
the same food the puppy is currently eating
a measuring cup or kitchen scale
a container for food storage
Tip: avoid changing your puppy’s diet right away unless necessary.
2. Sleep and rest
a dog bed or mattress
a blanket
Tip: choose a bed that is easy to wash.
You can also check our article How to choose the right bed for your dog.
3. Walks and training
a properly sized collar or harness
a lightweight leash
an ID tag
treats for training
waste bags for walks
4. Home and safety
a playpen or divider
a few safe toys
chew toys
odor remover
a brush suited to your puppy’s coat type
5. Health
contact details for a nearby veterinary clinic
a carrier for transport
a folder for documents, vaccinations and notes
The first days at home
On the first day, your puppy needs calm more than stimulation.
It’s best to:
limit the number of visitors
show water, sleeping area and potty spot
let them explore at their own pace
keep your voice calm
avoid forcing interaction or play
observe more than you interfere
The best preparation is not about buying everything, but about setting up your home properly. If the space is safe, the essentials are ready and the routine becomes clear over time, your puppy will adjust much more easily.
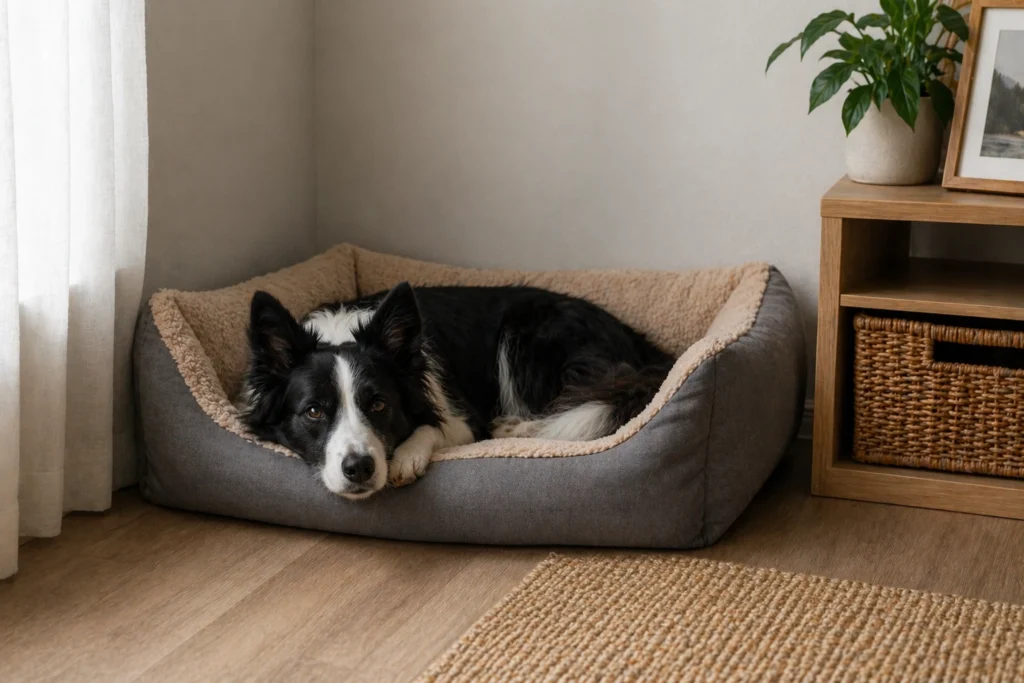
A dog bed is where your dog sleeps, rests and spends a big part of the day. Its comfort directly affects your dog’s daily well-being. That’s why it’s worth choosing carefully, taking into account your dog’s size, age and even their preferred sleeping position.
Size: allow extra space
The bed should let your dog lie comfortably in a natural position without feeling cramped. Some dogs stretch out fully, while others curl up and change position throughout the night.
To estimate the right size:
measure your dog from nose to the base of the tail while lying down
add extra space so they can shift positions freely
keep in mind that raised sides reduce the usable space inside
If the bed is too small, your dog may avoid it or only use part of it.
Types of dog beds
Mattress or cushion
A flat, open surface without raised edges.
Suitable for: dogs that like to stretch out, large breeds, warm indoor spaces.
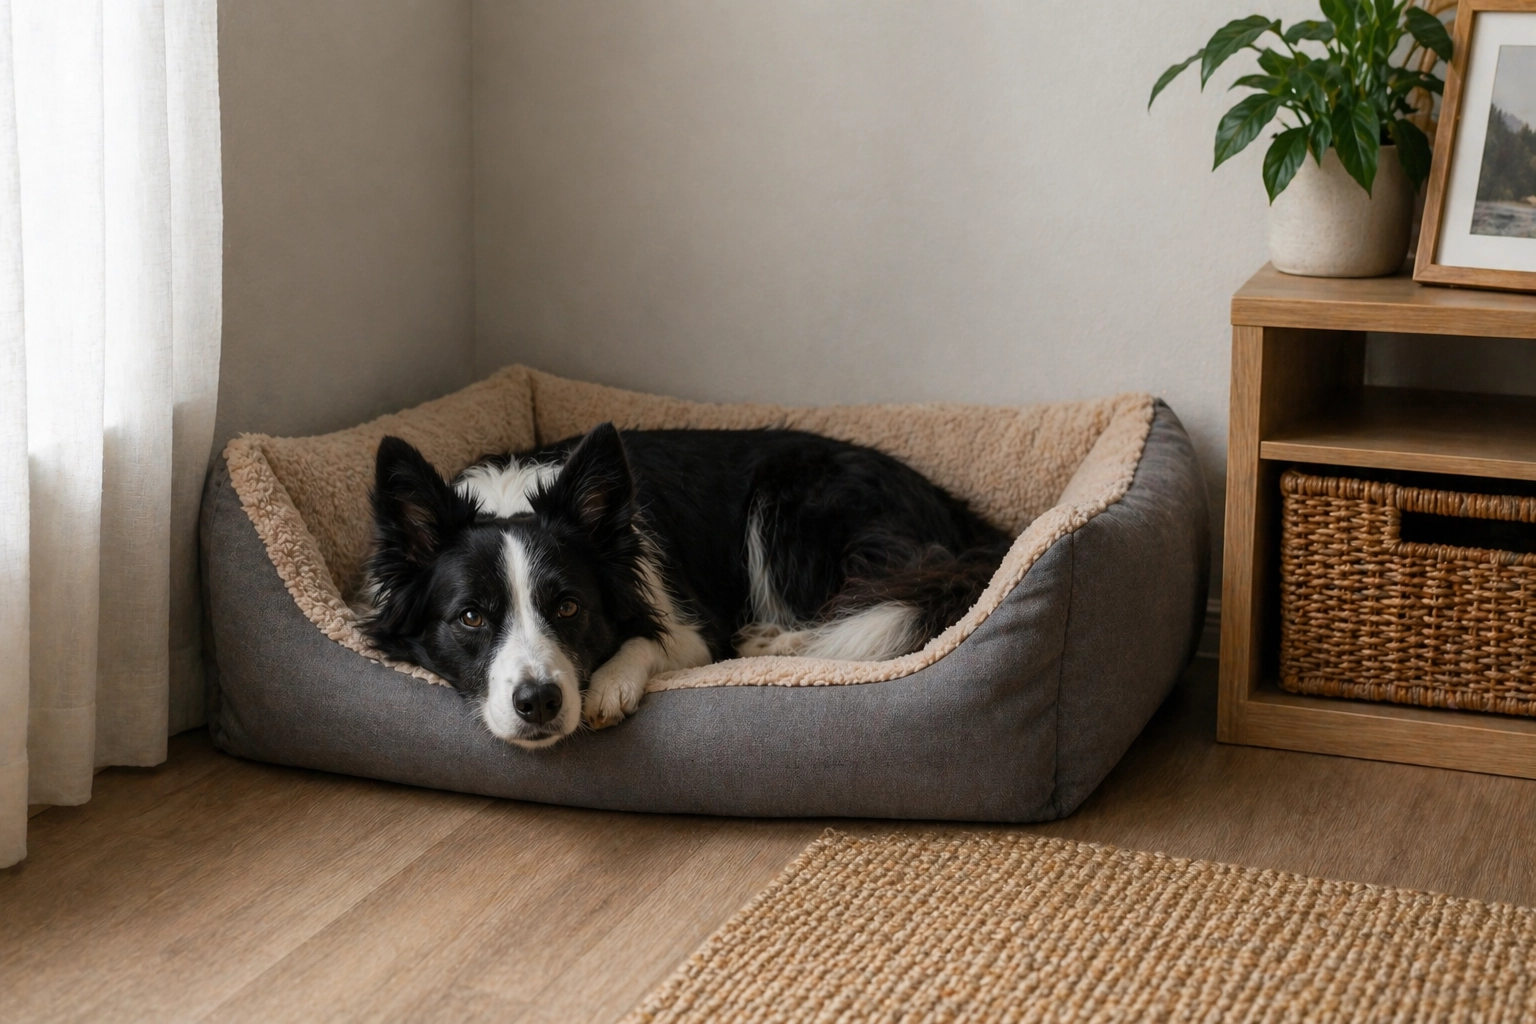
Bolster bed
Soft raised edges around the perimeter.
Suitable for: dogs that like to curl up and rest their head on something.
Enclosed bed
A covered design that provides a sense of shelter and privacy.
Suitable for: cautious, small or noise-sensitive dogs.
That said, not all dogs enjoy enclosed spaces.
Filling
A good filling should hold its shape and distribute weight evenly instead of clumping.
Common options:
high-density foam
hollow fiber and other synthetic fills
memory foam
For large, senior dogs or dogs with joint discomfort, choose a firm base with good support.
Bed care
A dog bed is used every day, so easy maintenance matters.
What to look for:
a removable cover
machine-washable materials
durable, wear-resistant fabric
clean stitching without loose threads
a non-slip base for smooth floors
If your dog sheds heavily, light fabrics may need more frequent cleaning. If your dog tends to dig, choose more durable materials.
Age matters
1. Puppy
Choose something easy to wash. Many puppies chew on fabric, so an affordable option is often best at first.
2. Active adult dog
Durable, easy-care beds are the best choice.
3. Senior dog
Look for a low entry, stable shape and a firm, supportive surface.
If your dog has chronic joint or spine issues, or is recovering from an injury, it’s best to consult a veterinarian before choosing a bed.
Where to place the bed
Even a good bed may go unused if it’s placed in the wrong spot. Choose a calm area without drafts. Unlike cats, many dogs prefer to stay close to their people rather than being isolated.
It may take some trial and error to find the right location.
Common mistakes
choosing a bed that is too small
thin filling that quickly loses shape
fabric that is difficult to clean
high beds that are hard for older dogs to access
choosing based only on appearance
expecting your dog to love it immediately
The right bed combines comfort for your dog with practicality for you: the right size, a supportive surface and easy care. The better it matches your dog’s habits and needs, the more likely it is to become their favorite place to rest.
Learning to use pee pads is one of the first everyday skills a puppy picks up. The key is consistency: puppies learn gradually through repetition and clear associations.
When pee pads make sense
Pee pads are useful:
during the first months of a puppy’s life
after vaccinations, when outdoor walks are limited
at night or during bad weather
for small breeds (like Pomeranians, Yorkies or Chihuahuas)
during the adjustment period in a new home
Even if your dog will eventually go outside, pee pads can be a helpful transitional step.
What to keep in mind
A puppy cannot control bladder function the same way an adult dog can. Accidents early on are a normal part of the process, not “bad behavior” or stubbornness.
Puppies usually need to go:
after sleeping
after eating or drinking
after active play
first thing in the morning
How to set up training
1. Choose a fixed spot
Place the pad in a quiet, easy-to-reach area. Avoid moving it unless necessary. Consistency helps your puppy learn faster.
2. Limit the space
If your home is large, it can be harder for a puppy to figure things out. At first, it helps to keep them in one room or place pads in several areas.
3. Take your puppy to the pad at the right times
After sleep, meals or play, bring your puppy to the pad and wait a few minutes.
4. Reward immediately
As soon as your puppy uses the pad, praise them and offer a treat.
5. Repeat consistently
The more successful repetitions, the faster the habit forms.
If your puppy misses the pad
Do not scold or punish after the fact. Your puppy will not connect the correction to something that already happened and will not understand what went wrong.
What to do instead:
clean up calmly
use an odor remover
think about what you missed
adjust your routine and supervision
Helpful tips
remove rugs for now
watch for signals: puppies often circle and sniff the floor before going
stay calm and patient
When to expect results
Some puppies learn quickly, others take more time. It depends on age, routine, personality and your consistency. Progress usually does not happen overnight — it builds step by step.
The most effective way to teach your puppy to use pee pads is a clear routine, calm training and regular positive reinforcement. Patience and repetition work far better than punishment.
Every day, dogs lose fluids through breathing, activity and normal body processes, so that water needs to be replaced regularly. Proper hydration helps support your dog’s health and overall well-being.
How much water does a dog need each day?
On average, a healthy adult dog needs around 40 to 70 ml of water per kilogram of body weight per day:
5 kg dog: about 200–350 ml
10 kg dog: about 400–700 ml
20 kg dog: about 800–1400 ml
If your dog eats dry food, they will usually need more water. With a wet-food diet, part of their fluid intake comes from meals.
What affects thirst?
The amount a dog drinks can change from day to day. For example, after a walk or during hot weather, the bowl may empty faster than usual — and that can be completely normal.
Thirst often increases with:
hot weather
active walks and playtime
dry indoor air
dry food
pregnancy and nursing
recovery after exercise
How to tell if your dog is drinking too little
Pay attention if your dog:
has dry gums
rarely goes to the water bowl
urinates less than usual
seems lethargic or sleepy
refuses food
struggles in hot weather
These signs can point to dehydration, so do not delay contacting a veterinarian.
If your dog drinks too much
Increased thirst is also worth paying attention to. Sometimes it is linked to hot weather or diet, but if your dog suddenly starts drinking noticeably more than usual without a clear reason, it can also be associated with various health issues. This is especially important if the increased thirst comes with frequent urination, weight loss, weakness, vomiting or a reduced appetite.
How to support healthy drinking habits
fresh water should always be available
wash the bowl regularly
change the water daily, and more often in hot weather
bring water and a portable bowl when traveling
place several bowls around the home if you have a large space
There is no single number that fits every dog. Look at your dog’s weight, lifestyle and the weather. If your dog is active, eating well and feeling good, small variations are usually nothing to worry about. Sudden changes in thirst, however, should not be ignored.
Bringing a kitten home is exciting, but good preparation makes all the difference. A safe environment and the right essentials will help your new pet settle in quickly, feel secure and adapt more easily to your home routine.
In this guide, we explain how to prepare for a kitten so your first days together feel calm, comfortable and stress-free.
Prepare your home in advance
For a small kitten, even ordinary household items can be risky. The calmer and safer the space feels at the beginning, the easier the adjustment period will be.
Make your home safe
Hide electrical cords and cables your kitten could chew.
Keep cleaning products, medicines and small objects out of reach.
Check your windows. Use secure screens or safe ventilation locks.
Make sure your houseplants are safe for cats, as some are toxic.
If you have high surfaces, limit access at first so your kitten cannot climb and fall during play.
If you have small children
Explain in advance that a kitten is not a toy, but a living animal that also needs time to adjust to a new home. The first few days are especially important for a calm start.
It helps to agree on a few simple rules:
do not pick up the kitten without an adult
do not wake the kitten while it is sleeping
do not pull the tail, paws or ears
do not shout nearby or scare the kitten
always let the kitten walk away or hide
use proper toys for play, not hands
A gentle introduction helps both the child and the kitten become true friends.
Keep the first days stress-free
Prepare a quiet corner where your kitten can rest. On day one, avoid too much attention or excitement. Your kitten needs time to explore new smells, observe the space and feel safe.
There is no need to introduce every room right away. At first, one area with a bed, water, food and a litter box is enough. This helps your kitten adjust to the new environment and daily routine.
What to buy first
Here are the essentials to have ready before your kitten arrives:
1. Food and water bowls
You will need at least two bowls: one for water and one for food. If you plan to serve both dry and wet food, having a third bowl is helpful.
Choose sturdy ceramic or stainless steel bowls. They are safe, easy to clean and long-lasting. Fresh water should always be available.
2. Litter box and litter
Choose a litter box that suits your kitten’s size. Your pet should be able to step in easily and turn around comfortably. For very young kittens, low-sided boxes are usually best. Place the litter box in a quiet area away from noise and drafts. There are many litter types, and the best option often comes down to trial and observation. If your kitten is already used to a certain litter, it is best not to change it right away.
3. Food
The right diet depends on your kitten’s age, breed and your veterinarian’s advice. Young kittens need food specially formulated for growth. Avoid sudden diet changes. If your kitten was eating something different before, switch gradually over several days.
4. Carrier
A carrier is useful for much more than vet visits. It keeps your kitten safe during travel and can also become a cozy hiding spot at home. Choose a sturdy carrier with good ventilation and a secure door. Leave it open regularly so your kitten can start seeing it as a familiar and safe place.
5. Scratching post
A scratching post helps protect furniture and gives your kitten a natural place to scratch and maintain its claws. Place it near your kitten’s future resting area. To make it more appealing, choose one with a hanging toy or add a little catnip.
6. Toys
Toys are essential for healthy development and mental stimulation. Shared playtime also helps build trust between you and your kitten. Choose balls, wand toys and soft safe toys without small detachable parts.
What you need for kitten care
Here are a few essentials for regular care and overall health:
1. Grooming basics
Useful items may include:
a brush or comb
nail clippers
pet wipes
shampoo, if needed
Do not use products made for humans. They are not suitable for animals’ sensitive skin. At first, a basic set is enough, along with gentle introductions to grooming routines.
2. Parasite protection
Even indoor cats need protection from external and internal parasites. Drops and tablets should always be chosen based on age and weight, as unsuitable products may be unsafe.
3. When to see a vet
A routine check-up soon after bringing your kitten home is a smart idea. A veterinarian can assess overall health, recommend vaccinations, advise on parasite prevention and answer feeding or care questions. If your kitten loses appetite, becomes lethargic or develops digestive issues, seek veterinary care without delay.
Common issues in the first weeks
Every kitten adjusts differently. Temporary challenges are common at first and are usually resolved with patience, calm routines and consistency.
1. Not eating
After moving to a new home, a kitten may refuse food because of stress. Give it time, keep the environment calm and make sure fresh water is always available. If appetite does not return within 24 hours or other symptoms appear, contact a veterinarian.
2. Hiding
This is a normal response to a new environment. Do not pull your kitten out by force. It will come out when it feels more confident. A calm voice and predictable surroundings will help your kitten settle in faster.
3. Not using the litter box
The cause may be stress, an inconvenient location or an unsuitable litter box. Keep the area clean and remove strong smells nearby. You can also try a litter training aid.
4. Biting and scratching
Your kitten may bite or scratch while playing, defending itself or burning off energy. Redirect attention to toys and avoid encouraging play with hands. With patience and consistency, this behavior usually improves over time.
Taking good care of a kitten is not only important for health, but also a wonderful way to build a strong bond during the first stage of your life together. A happy kitten will thank you with gentle purring and affection.
A litter box is one of the essentials for any cat at home. To help your cat build good toilet habits as quickly as possible, the box should always be clean and the right size. In this article, we look at the main types of litter boxes, along with their pros and cons.
Types of litter boxes for cats
Some cats are perfectly happy with a simple open tray, while others prefer a more private and enclosed space. The best option for you and your pet is often found through trial and error.
If you want to switch from one litter box to another, here is the best way to do it:
Place the new litter box next to the old one. Do not remove the old box right away — your cat needs time to get used to the new item.
Use familiar litter. At first, keep the same litter and the same depth your cat already knows.
Let scent help. Add a small amount of used litter from the old box into the new one.
Be patient. Some cats adjust in a day, while others need more time.
Reward success. If your cat uses the new box, praise them with affection or a treat.
Once your cat starts using the new litter box regularly, the old one can be removed.
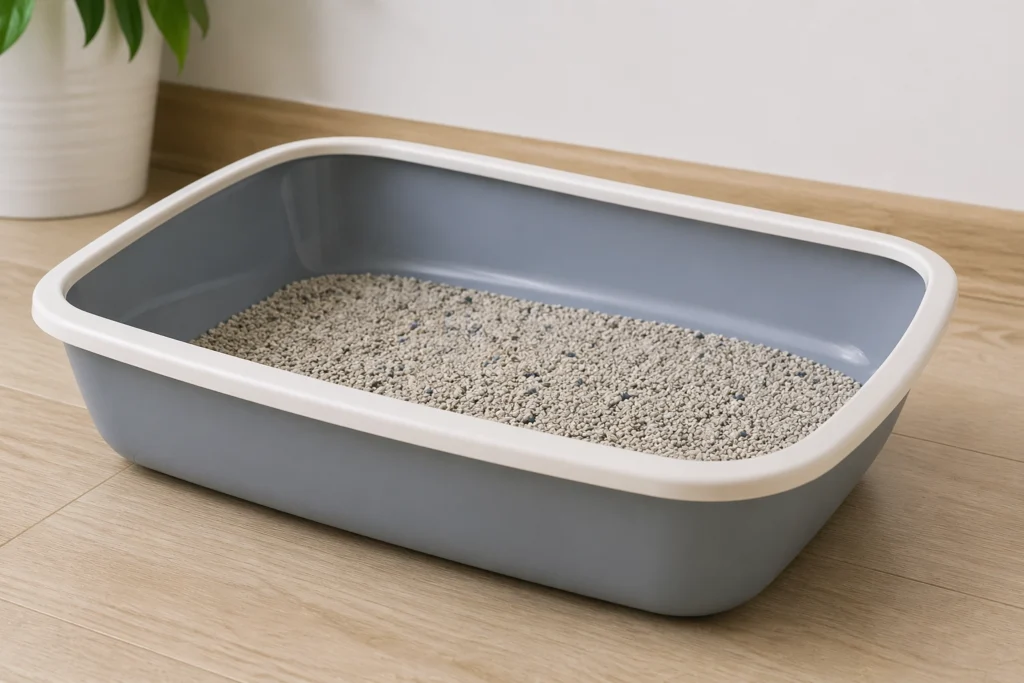
Classic open litter box
The most common and familiar option is a simple plastic tray with low or medium sides.
Pros:
affordable
easy to wash and scoop
Cons:
litter often gets kicked outside the box
odors may spread more easily
everything is visible
Despite these downsides, an open litter box is usually the best choice for kittens and senior cats.
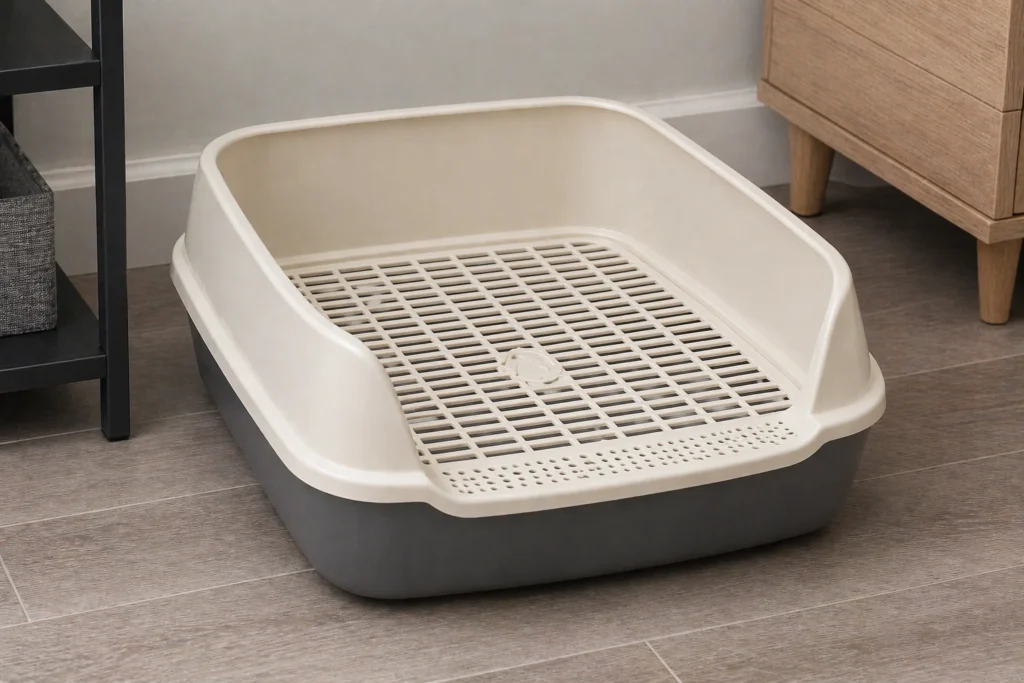
Litter box with grate
This is an open litter box with a plastic grid placed over the tray. Litter goes underneath the grate or may not be used at all.
Pros:
litter does not stick to paws as much
uses less litter, or none at all
the cat cannot eat the litter
Cons:
needs frequent cleaning
odor appears quickly
some cats miss the ability to dig
may take time to get used to
This option can work well for owners who are ready to clean the box several times a day to keep the area tidy. It is worth knowing that grate-style boxes can be harder for some cats to accept.
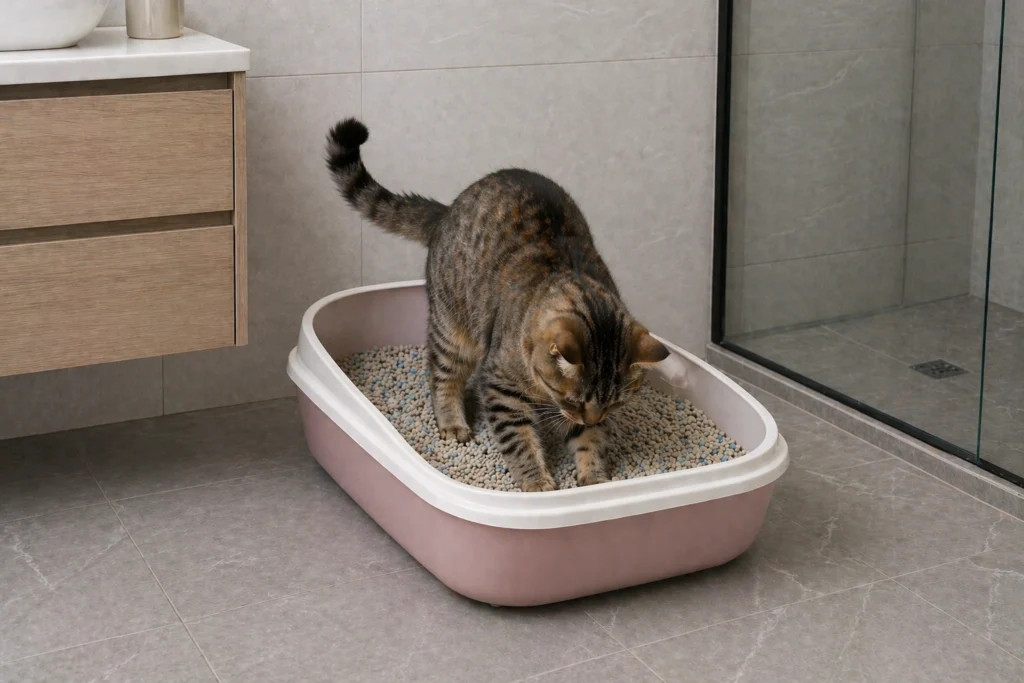
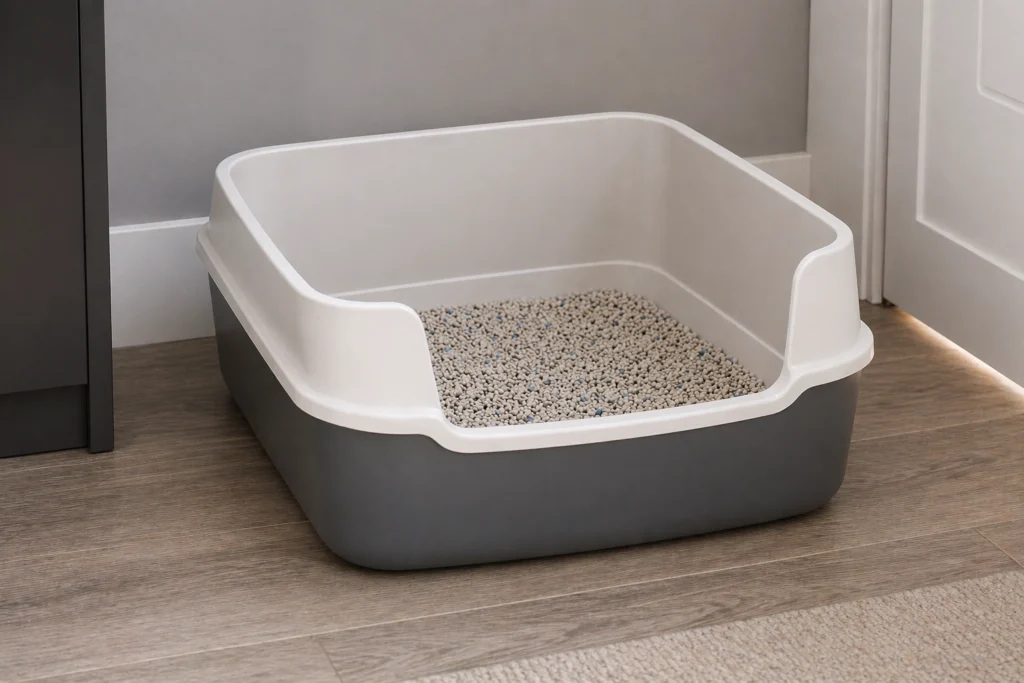
Litter box with high sides
High-sided boxes are ideal for cats that love digging energetically in their litter.
Pros:
much less mess around the box
more room for larger cats
Cons:
not ideal for kittens or senior cats, as getting in may be difficult
A great choice for active adult cats.
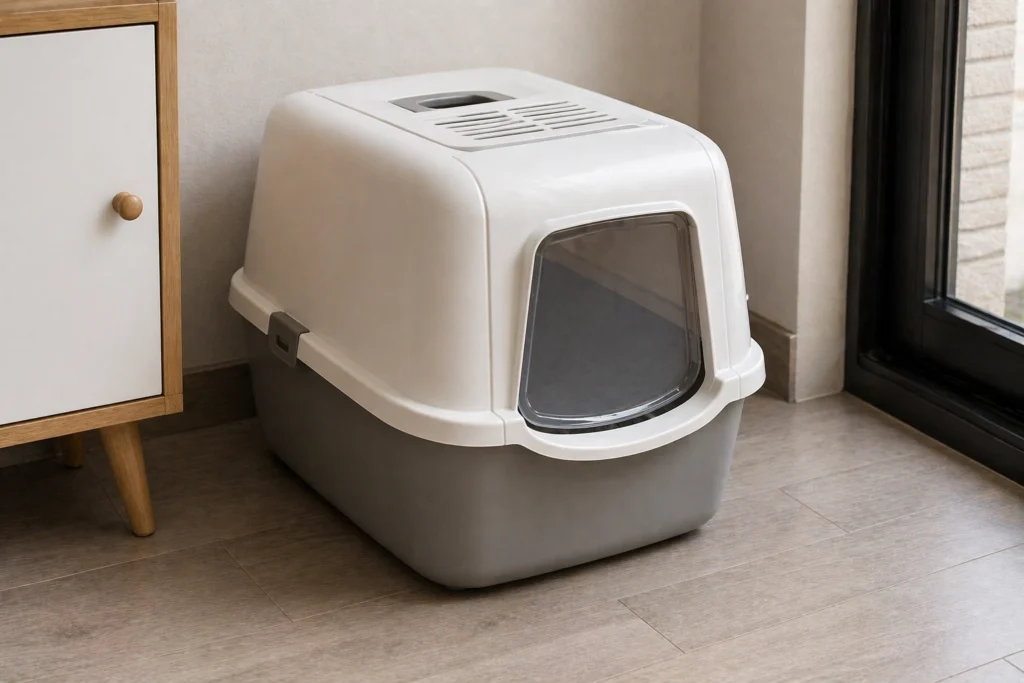
Covered litter box
Enclosed “house-style” models with a lid and an entrance on the side or front.
Pros:
less odor outside the box
litter stays inside more easily
more privacy for the cat
Cons:
takes up more space
still needs regular cleaning
not every cat likes enclosed spaces
A good option for shy cats and owners who value a tidy home.
Tip: The ideal height of a covered litter box is the distance from the litter surface to the tip of your cat’s ears while sitting, plus 5 cm (about 2 inches).
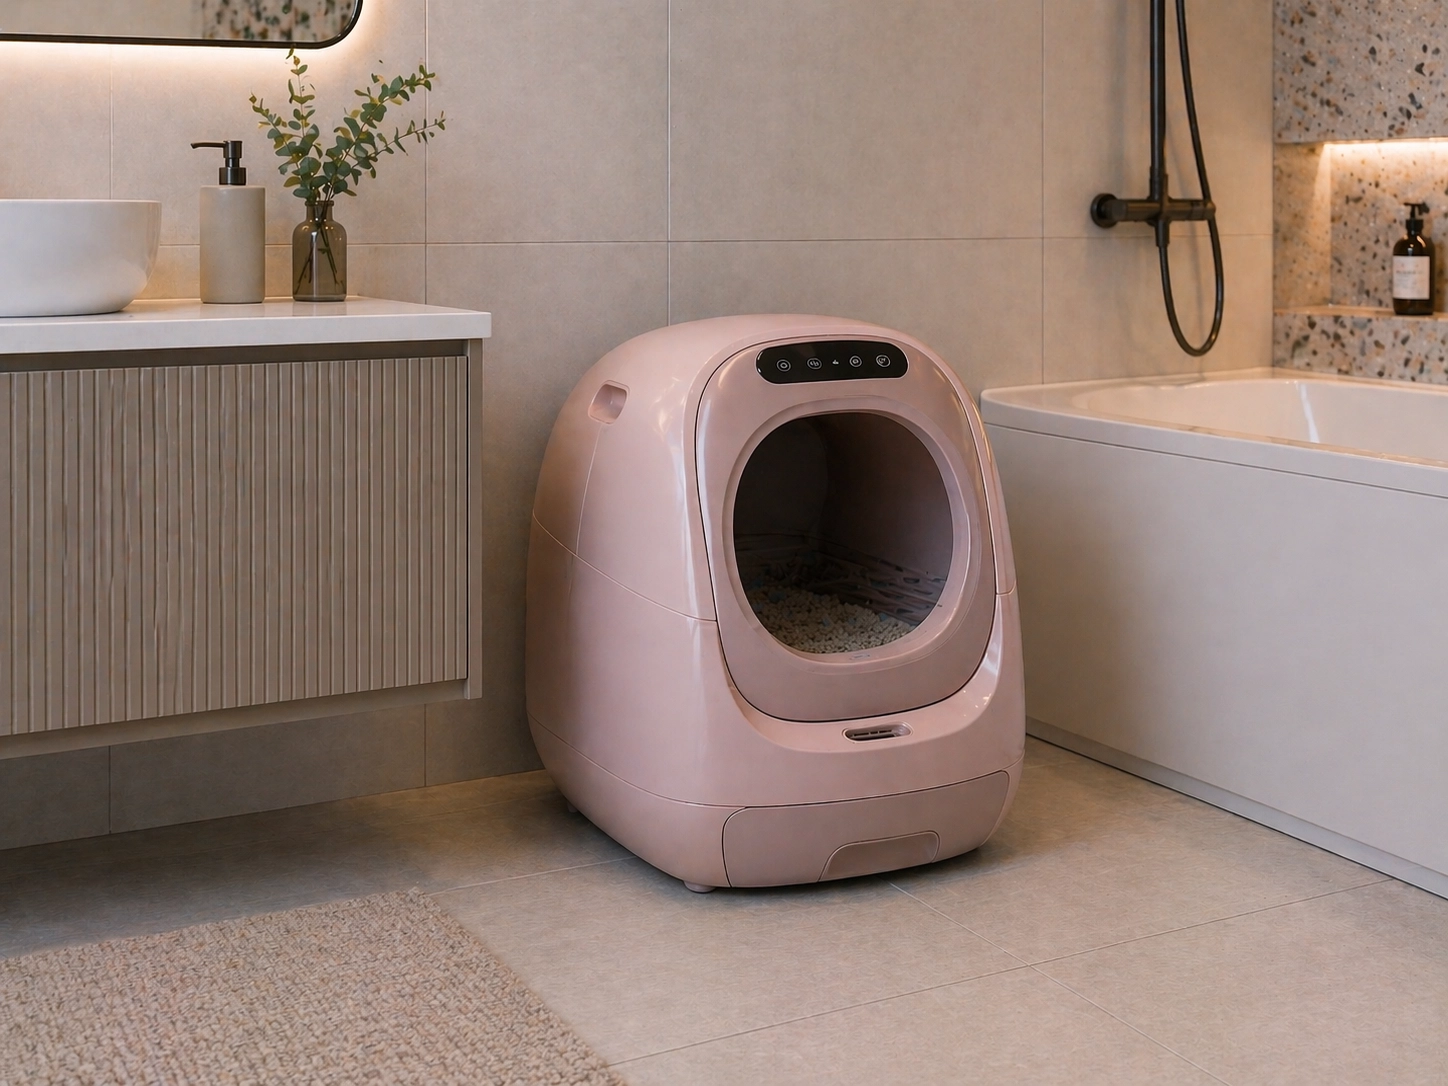
Self-cleaning litter box
An automatic model that removes waste after use.
Pros:
minimal manual cleaning
litter stays cleaner and fresher
some models include health tracking and notify owners how often the cat uses the box
Cons:
expensive
requires power
may scare some cats; poorly designed models can be unsafe
A convenient option for busy owners or frequent travelers, but not suitable for every cat. If you choose this type, reliable safety sensors are essential.
Useful accessories
Items that make litter box care easier:
Scoop. Choose one with slots large enough for clean litter to fall through, but small enough to hold clumps.
Litter mat. Helps catch litter from your cat’s paws and keeps the floor cleaner. If your cat likes chewing non-food items, this may not be the best choice.
Waste bags. Useful for quick and tidy disposal of used litter.
Litter storage container. Keeps extra litter nearby and protects it from moisture.
When choosing a litter box, do not focus on appearance alone. It should fit your cat’s size, feel comfortable and be placed in a calm location. If your cat avoids the box, the problem is usually not personality — it is often that the setup simply does not suit them.